
This Article May Contain Compensated Links. For More Info, Read Our Disclaimer Here.
- The two basic types of materials,
- The different types of camp ovens,
- How to season your camp oven,
- A few camp oven reviews, and
- One of the best camp oven recipes around.
So, let’s get going.
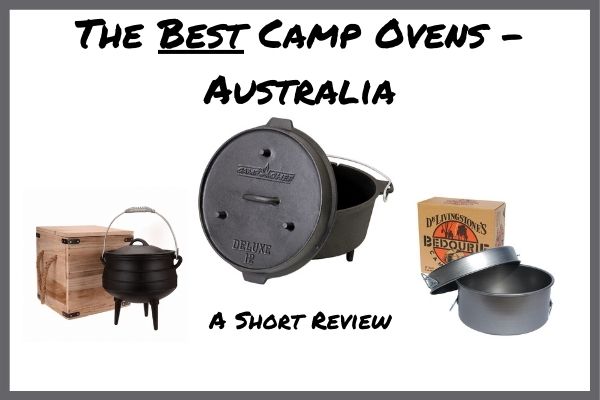
Best Camp Oven – Summary Table


Best Camp Ovens – Types of Materials
Cast Iron Camp Ovens
Pros
- Retains heat for much longer than any other material.
- Distributes heat around the pot more evenly, avoiding hot spots. Perfect for slow cook meals like casseroles, roasts and stews. Easier to control the cooking temperature.
- With a bit of care, will last a lifetime.
Cons
- Heavier than the spun steel counterpart,
- If dropped on a hard surface, there’s are risk of cracking/breaking the camp oven,
- Will take longer to get to temperature due to the thicker construction.
Spun Steel Camp Ovens
Back in the days when cookware was carried in horse saddle bags and prone to being broken, they came up with this outdoor camp oven. It’s also stood the test of time.
Pros
- Much more resilient when it comes to drops, knocks and bumps,
- Gets to cooking temperature quicker,
- Much lighter in weight,
- Lid can double up as a frypan.
Cons
- Need to be watched more closely during the cooking process as they are not as forgiving with temperature rises/falls and hotspots as the cast iron counterparts.
Introduction to Camp Ovens In Australia
- Different types of camp ovens
- Coal placement & heat flow – top down or bottom up?
- How to season a camp oven
- How to clean a rusty camp oven
- Cooking oils – oils ain’t oils!
- Does spending more money get you a better camp oven?
- Choice of heating material – wood vs charcoal?
And lots more. I think you’ll find it very helpful. I certainly did.
You can read a bit more about the history of camp ovens here.
Types of Camp Ovens
Flat Bottom Camp Ovens

For the cast iron versions, there should be a lip around the lid to put hot coals on to assist with the cooking without ash falling into the pot when lifting the lid.
Also, the lid should fit snugly into the pot, to preserve heat and moisture for whatever is cooking inside. Handles preferably should be coiled wire to avoid burns when you’re lifting a hot pot off and on the fire.
For spun steel camp ovens, the lid is typically flat to allow hot coals to be put on it, and it fits over the body of the camp oven.
Dutch Camp Ovens
Historically, the use of cast iron was preferred as it was the less expensive of the materials used to make cookware a few hundred years ago. The tradition is carried on to this day.
South African Potjie

I prefer these, as it is easier to put coals around and under them to get good heat distribution during the cooking process. The only downside is they do take up a bit more storage space in your camping setup.
I have seen enamelled Potjies, and they make cleaning and looking after the pot a whole lot easier, but be prepared to pay some dollars for them.
If you’re interested in trying a traditional mouth-watering South African Potjie camp oven casserole – click here for the recipe.
How to Season a Camp Oven
Why do we need to season, or cure, a cast iron camp oven? The casting process to make the oven often leaves slight imperfections on the internal surface, such as a rough surface and little bumps and hollows. What we need to do is to make this as non-stick as possible.
- Wash your new camp oven out thoroughly with warm water – don’t use detergent, as it will stick to the pores of the cast iron and leave a film on it.
- Make sure it is completely dry before applying a layer of vegetable oil by wiping the interior and the underside of the lid with a paper towel soaked in the oil.
- Pop it into a very hot oven for about an hour and let the vegetable oil bake onto the internal surfaces.
- Wipe off any excess and let cool. It should now have a slightly glossy look to it.
If you burn food onto the oven, then use a scourer or wire brush to clean it up, then apply the process above.
Having said that, some camp ovens and potjies do come pre-seasoned, so it may spare you the initial job. However, if you do need to do it, you’ve got the process.
Camp Oven Maintenance
- Do season them on a need’s basis.
- Don’t pour boiling water into a cold camp oven.
- Don’t pour cold water into a hot camp oven.
- Don’t drop them.
- Do oil them before putting them away to stop them rusting or corroding.
Camp Oven Accessories
Tripod – keeping the camp oven off the fire for a more controlled cook.
Trivet – a grate or perforated base to put inside the camp oven to keep food from contacting the base which may cause food to burn/stick.
Height Extension Ring – to increase the capacity of the camp oven. You won’t find this in cast iron camp ovens, but more the spun steel camp ovens. The Hillbilly camp ovens offer these as an accessory.
Carry Bag – Last, but not least, to protect your investment.
Potjie Camp Oven Casserole Recipe
Preparation time: 20 minutes
Cooking time: 3 – 4 hours:
Ingredients:
- 30 gms butter
- 30 ml of good vegetable oil
- 1.5 kg of meat (lamb, beef or ox-tail) cut into small pieces
- Seasoned flour
- 3 cloves garlic, sliced
- 1 stick celery
- 2 sprigs rosemary
- 12 baby onions, peeled
- 250 gm baby carrots, peeled (or 4 large carrots, cut into chunks)
- 12 baby potatoes (or 4 cut into pieces)
- 250 ml of strong beef stock
- 30 ml tomato paste
- 500 ml of good red wine
Pepper and salt
Method:
- Coat the meat pieces liberally in seasoned flour
- Heat the butter and oil in the Potjie
- Brown the meat and set aside
- Add the onions, garlic, carrot, celery and rosemary and fry until softened
- Add the meat back in, followed by the stock, tomato paste and wine
- Cook for 3 to 4 hours, or until meat is fall apart soft
- Add more wine if the liquid runs low
- Season to taste and serve with mash or homemade bread.
(Recipe: Thanks to Estelle Burgess)
Further Reading and Reviews


Ian Hill
No mention of my genuine Furphy, that I’ve used for over 35 years for winter base camps. Makes delicious roasts and cakes, the smell of a roast when returning to camp is memorable.
Mick
That’s beacuse this article is geared at generating sales of camp ovens, rather then real educational information, that will be beacuse this person has no idea except how to copy other’s information.
Keith
Mick
Thanks for your comment. If you have any additional info you’d like to share with readers to help them with camp ovens, please forward it to me. Very happy to publish it, giving you credit for the contribution. Cheers. Keith